


A few days ago, one of my friends reached out to me in a moment of trouble. She was preparing to see the new Captain America movie and wanted to wear a superhero-themed T-shirt. While there were many options, some were out of budget, while others were made of, let’s just say, questionable fabric.
Although she did find a T-shirt, her ordeal made me think, “What if you could screen print at home?” I’m sure many people want to try screen printing for T-shirts but struggle to find the right designs, materials, or affordability. Well, I set out to learn how to screen print at home, and the results were spectacular.
Note: I practiced multiple times before finally getting it right. So, don’t expect perfect results on your first try.
Look at me just going on and on. Forgive me for being presumptuous, but I thought everyone might already know what screen printing is. Screen printing is a technique in which ink is forced onto a surface through a mesh screen. You can screen print shirts at home using simple tools, and the method also works for paper, metal, and glass.
Screen printing is widely used because it produces vibrant, long-lasting results, is suitable for large-volume production, and can be used on various materials.

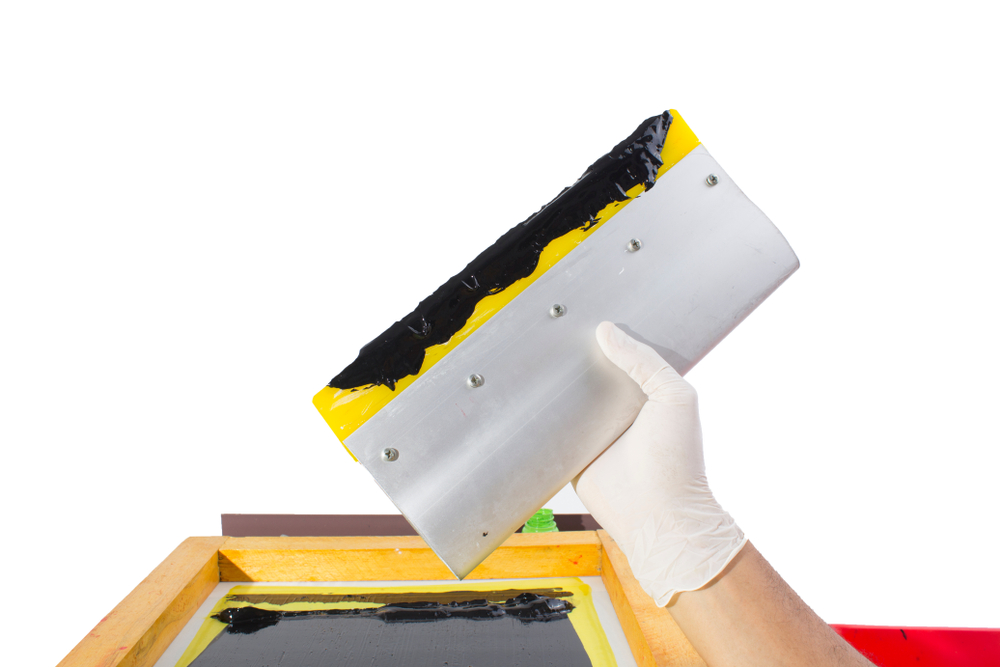
Before starting the process, gather a complete screen print at home kit, which includes essential tools like a screen, squeegee, and ink.
Above everything else, screen printing at home is quite fun—and if things go well—rewarding, too. However, it’s essential to follow a few steps, which we’ve mentioned below:
Select the screen printing frame, be it store-bought or DIY. Stretch a fine mesh tightly across the frame and secure it in place. To ensure smooth transfer, make sure the mesh is clean and free from dust and oil.
Before you screen print on fabric at home, decide on the design you want to use. You can create one with design software like Adobe Photoshop or Canva or opt for a digital screen print design maker for precise stencil cutting.
Apply a thick layer of the emulsion evenly across the mesh screen. Wait for it to dry before placing the printed transparency on the screen and exposing it to UV light or a strong bulb. The duration can vary, depending on the design and surface.
After exposure, rinse the screen with cold water, resulting in the washing of the emulsion in the design area. This will leave an open stencil. Do not move to the next process until the screen is completely dry.
Lay your fabric on a flat surface and position the screen over it. Pour fabric ink on one edge of the screen. Use a squeegee to pull the ink across the design with firm, even pressure. Lift the screen carefully to reveal your print.
(If you’re printing on non-fabric surfaces, like glass or wood, use appropriate inks like glass enamel ink or acrylic-based ink. The process will remain the same except for the pressure and curing time.)
Let the print dry completely before moving on to screen printing heat transfer methods. Use a heat press or an iron to set the ink for fabric prints. Non-fabric inks may require baking or air drying, depending on the ink type.
You’ll make many mistakes while learning to screen print on clothing at home. However, that doesn’t mean you shouldn’t be careful. Here’s a list of some of the most common screen printing mistakes and how to avoid them:
If your screen is overexposed, the emulsion becomes too hard, making it difficult to wash out the design. Conversely, if the screen is underexposed, the emulsion will wash out completely, ruining the stencil.
Fix: Time the exposure time based on your light source. Test the exposure on a small section before committing to a full design.
If the ink bleeds under the stencil, your design will look blurry. If it doesn’t, it may not bond properly.
Fix: Make sure your screen is tightly stretched, and use the right ink for your material. Apply appropriate squeegee pressure; neither too much nor too little.
Not all fabrics or surfaces hold ink well. Some materials absorb ink, whereas others repel it.
Fix: Cotton and cotton-based fabrics produce the best results. Non-fabric surfaces, on the other hand, tend to react better with specialized inks that adhere properly.
Ink and emulsion buildup can damage screens, reducing print quality over time.
Fix: After using the screens, rinse them immediately with warm water and mild soap. Store them in a dry and dust-free area to prolong their lifespan.
Proper care is essential to maintaining the vibrancy and longevity of screen-printed designs. Here are some key tips to prevent fading, cracking, or peeling over time.
By following these simple steps, you can keep your screen-printed items looking fresh and vibrant for years.
Screen printing at home is a complex process, but if you follow it properly, the results can be breathtaking. Imagine printing your favorite designs anytime on any surface. Of course, it’s easier said than done, so I’ve given you a detailed walkthrough. Remember to leave room for flexibility, as you might have to screen print multiple times before producing the desired results.
And if you don’t want to go through the trouble, browse our website. We offer a comprehensive range of clothing options for men and women, and we provide efficient screen printing services—talk about feeding two birds with one scone.