The advancement of technology is not privy to anyone. We’ve come so far that things that felt impossible a few years ago are not only possible today, but they’ve become an integral part of our lives.
For instance, earlier, if you wanted to translate a foreign language, you’d have no choice but to ask someone who spoke that language. Today, it’s as simple as pointing your smartphone’s camera toward the text. Call us old-fashioned, but despite technological progress, some things feel better without its intervention. Take screen printing, for example.
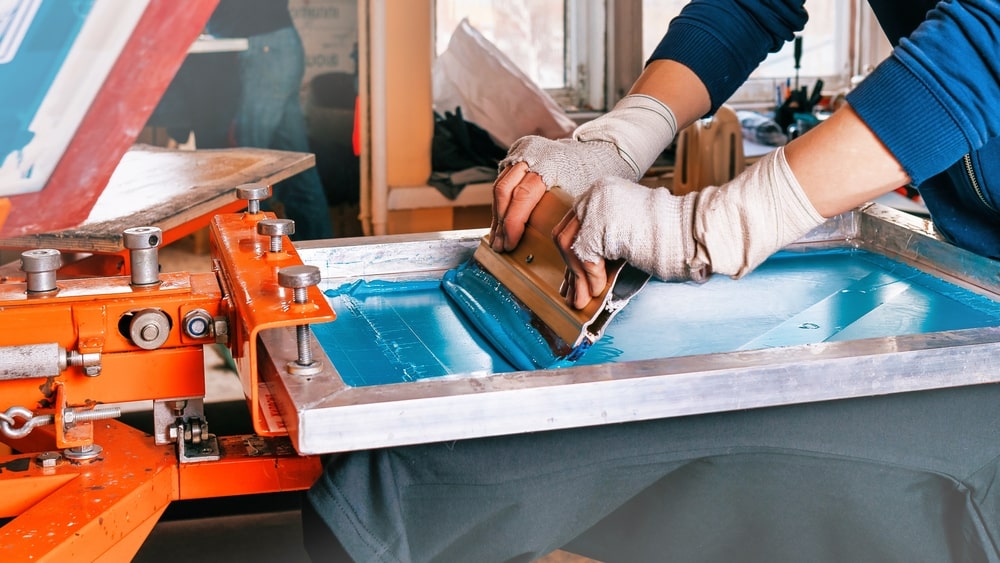
It requires hand-coating a screen with emulsion, placing the stencil and exposing it to light, using a squeegee to push the ink onto the substrate, and heat-curing the ink—all done with bare hands. Of course, machines can make the screen printing process more efficient, but manual methods give the object a unique look. If you’d like to learn how screen printing is done, you’ve come to the right place. In this blog, we’ll walk you through the process.
What Is Screen Printing?
Screen printing in denver, also known as silk printing, is a technique in which ink is pushed through a stencil mesh screen onto a surface, typically a T-shirt, poster, mug, or tote bag. Screen printing is popular for many reasons—it produces vibrant colors and delivers long-lasting results, to name a few.
There are different types of screen printing, including:
- Spot Color Screen Printing uses a single, solid color per screen.
- Halftone Printing uses tiny dots of a single color to create shades.
- Grayscale Screen Printing converts images into black and gray tones.
- Duotone Printing uses two halftone screens with different colors.
- Four-Color Process (CMYK) uses four colors: Cyan, Magenta, Yellow, and Black, hence the name.
Supplies Required for Screen Printing
Although screen printing is best left for professionals, there’s no harm in engaging in a little DIY project. But you’ll require a few screen printing supplies, which we’ve listed below:
- Screen Mesh
- Frame
- Photo Emulsion
- Transparency Film
- Emulsion Remover
- UV Light or Exposure Lamp
- Screen Printing Ink
- Squeegee
- Tape
- Printing Material
- Printing Platen
- Drying Equipment
Once the ink is applied to the object, it must dry in a dark or low-light room.
Screen Printing: Step-By-Step Guide
For your convenience and to make it easier to explain, we’re going to assume that the object you wish to screen print is a t-shirt.
- Step 1: Design your artwork using Adobe Photoshop, Illustrator, Canva, or similar software, preferably in black and white.
- Step 2: Print the desired design onto a transparent film using a laser or an inkjet printer.
- Step 3: Use a screen with a mesh count suitable for your design. A lower mesh count is suitable for thick designs, while a higher mesh count is best for detailed designs.
- Step 4: Apply a photo emulsion evenly to the mesh screen using a squeegee or a scoop coater (this should be done in a dark room).
- Step 5: Place the T-shirt in the same or another dark place for drying. This can take several hours.
- Step 6: Place the printed transparency on the screen with the design facing down.
- Step 7: Harden the emulsion around the design using a UV exposure lamp or sunlight. Depending on the light source, this can take 2-5 minutes.
- Step 8: After the exposure, rinse the screen with a spray hose to wash away the unexposed emulsion, leaving a stencil of your design.
- Step 9: Let the screen dry completely before printing.
- Step 10: Lay down the T-shirt on a flat surface. Make sure the fabric is smooth.
- Step 11: Place the screen on top of the T-shirt. The design should be at the center, and masking tape should be used to prevent the ink from leaking.
- Step 12: Pour the screen printing ink at the top of the screen.
- Step 13: Pull the ink down over the stencil using a squeegee.
- Step 14: Apply firm pressure on the screen and run the squeegee more than once for even coverage.
- Step 15: Lift the screen carefully and slowly. Otherwise, the ink will smudge, ruining the design.
- Step 16: Use a heat press for 30-60 seconds to ensure the design lasts through washes. Place a thin cloth over the print so the heat doesn’t ruin the design.
- Step 17: Use warm water and a sponge to remove excessive ink.
- Step 18: Let the screen dry before placing the t-shirt in a cool and dry place.
Tips for Producing Better Results While Screen Printing

While screen printing at home, it’s essential to follow these tips to produce better and long-lasting results:
- Adjust halftones properly if using gradients.
- Use a coater for smooth, even emulsion layers.
- Maintain proper curing and drying.
- Clean your equipment immediately after using it.
How to Screen Print Shirts Using a Machine
Using an automatic or semi-automatic screen printing machine improves efficiency and consistency. Here’s a step-by-step guide to achieving professional results:
1. Prepare Your Design
- Use vector graphics (AI, EPS, or SVG) for sharp prints.
- Ensure the design is high resolution (300 DPI) for detailed printing.
- Convert text to outlines to avoid font issues.
2. Prepare the Screens
- Choose the right mesh count for your design and ink type:
- Lower mesh (80-160): Thick inks, bold prints.
- Higher mesh (200-305): Fine details, water-based inks.
- Coat the screen evenly with emulsion and let it dry in a dark, dust-free space.
- Use an exposure unit to burn the design onto the screen, then rinse with water.
3. Set Up the Screen Printing Machine
- Secure the screen into the machine’s printing head.
- Align the shirt platen with registration marks for accurate prints.
- Adjust the off-contact distance (the gap between the screen and the shirt) for smooth ink transfer.
4. Load the Shirt & Print
- Place the shirt on the platen and smooth out wrinkles.
- Apply a pallet adhesive to keep the fabric in place.
- Lower the screen onto the shirt.
- Use the machine to automatically apply ink using a squeegee stroke:
- Fill the screen with ink before printing.
- Push ink through the screen onto the fabric.
- Repeat if using multiple colors, ensuring proper registration.
5. Cure the Print Properly
• Use a conveyor dryer or heat press to cure plastisol ink at 320°F (160°C).
• Test cure by stretching the print—if it cracks, it’s undercured.
• For water-based ink, ensure proper drying time and heat exposure.
6. Quality Control & Cleanup
- Inspect shirts for misprints, smudging, or ink inconsistencies.
- Clean screens immediately after printing to avoid ink buildup.
- Store screens properly to extend their lifespan.
Common Screen Printing Mistakes That You Must Avoid
Whether screen printing with a machine or hand, mistakes can happen. These are the most common ones, and here’s how you can avoid them while doing t-shirt screen printing step by step:
Issue #1: The layers don’t align properly when printing multiple colors.
Fix: Use registration marks on your design and adjust the screens accordingly.
Issue #2: The printer produces uneven, botchy, or faded prints.
Fix: Tighten the screen tension because a loose screen won’t apply ink evenly.
Issue #3: The ink spreads outside the design, causing blurry edges.
Fix: Check the mesh count, as low mesh can deposit too much ink.
Issue #4: The design fades or peels after washing and doesn’t stick.
Fix: Cure plastisol ink at 160 degrees C for proper adhesion.
Issue #5: The printer produces a faint outline of the previous print.
Fix: Clean the screens each time after printing before moving to the next.
Issue #6: The ink doesn’t pass through the screen evenly and leaves gaps.
Fix: Use a retarder additive for water-based inks for slow drying.
Issue #7: The stencil design doesn’t hold properly or washes out.
Fix: Determine the correct exposure time based on your emulsion and light source.
Concluding Thoughts
When handled properly, screen printing produces excellent, long-lasting, and vibrant results. The key is to follow the proper instructions, whether you’re doing it manually or through machines.
At Nostalgic Screen Printing, we follow a meticulous process that we’ve honed over the years. It results in pitch-perfect designs on t-shirts, mugs, and tote bags.